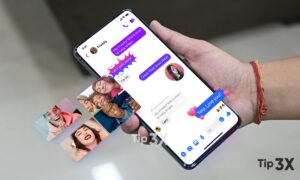
Unlike the Facebook Messenger application on our smartphone or tablet, which can easily access the camera and microphone on a Windows 10 desktop or laptop, the new FB Messenger application must do something for Cam and Mic to work.
In Windows 10 PC, most apps, including Facebook Messenger, by default are not set to have access to its connected generic camera or webcam device due to security and privacy concerns.
How to Turn On Camera on Facebook Messenger Windows 10
In most cases, when you do a video call for the first time on the Messenger app on your Windows 10 PC, the app will ask you for permission to have access to your camera. You only have to allow access for the first time.
Step 1: Search for and open Settings via Windows 10 search bar or Cortana.
Step 2: In the Settings window, select Privacy. Then, in the left pane, select Camera under “App permissions”.
Step 3: Under “Allow access to the camera on this device“, click on Change and make sure the “Camera access for this device” option is turned on.
Step 4: Under “Allow apps to access your camera“, make sure the option is turned on.
Step 5: Under “Choose which Microsoft Store apps can access your camera“, look for the Messenger app and make sure the switch beside it is turned on. This is to allow the Messenger app to have access to your camera.
Join Tip3X on Telegram